The Mechanize library is built on top of the Nokogiri library, adding additional functionality for interacting with a website through an app. Our team used mechanize in order to scrape the number of badges a student earned on team treehouse for our project. Mechanize is used in cases where you need to interact with forms and links.
Now we’re in, well assuming you specified your own account login/password, and can begin scraping the site using Nokogiri!
If you wanted to say, click on a link from the homepage you could search for the link text:
1
agent.page.link_with(:text => "About").click
If there was more than one link with the text “About”, you could use the plural form of link and obtain a list of links, then choosing which one you want:
1
agent.page.links_with(:text => "About")[0].click
There are a plethora of other ways to use mechanize in interacting with websites, the documentation is pretty robust and clear, check it out!
If you’re anything like me, you’re constantly looking for a more efficient way to do things. One time-suck that I encountered working in Rails is typing out erb tags in view files. I can’t imagine a more annoying set of characters to type in order to write Ruby in HTML and we use them ALL THE TIME. So I set out on a mission to simplify this task in my chosen text editor, Sublime. I came across Snippets, the handy dandy tool which would prove to make my, and soon your, coding life a smidge easier.
Snippets are XML files used for creating text shortcuts. Sublime comes with a package of built-in snippets. For example, have you ever noticed that when you type def within a ruby file and hit tab you are provided with a method-name and an end? The method-name is automatically highlighted, positioning the user to overwrite it with their chosen method name. If you hit tab again, the cursor magically moves you to the next line positioning you to define the functionality of your method. This isn’t magic people, it’s a snippet!
Well now we can all create our own magic. We’ll use those pesky erb tags as our example. To create a new snippet, go to the Sublime toolbar and open the Tools. Click on “New Snippet”.
You will be provided with a snippet skeleton, which details the code necessary to make it work.
123456789
<snippet>
  <content><![CDATA[
Hello, ${1:this} is a ${2:snippet}.
]]></content>
  <!-- Optional: Set a tabTrigger to define how to trigger the snippet -->
  <!-- <tabTrigger>hello</tabTrigger> -->
  <!-- Optional: Set a scope to limit where the snippet will trigger -->
  <!-- <scope>source.python</scope> -->
</snippet>
Within the content tags in the square brackets after CDATA, define the desired output.
1
<content><![CDATA[<% %>]]></content>
You can specify the desired cursor location after keying tab.
1
<content><![CDATA[<% $0 %>]]></content>
Or even a sequence of movements!
1
<content><![CDATA[<% $2 %> $1]]></content>
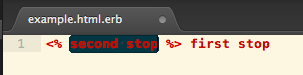
In this case, after typing er (this step is explained next) and pressing tab, the cursor will move to the $1 location. When you press tab again, the cursor will move to the location at $2. Note that I didn’t use $0 as the starting point as I had in the previous example. That is because $0 specifies the exit point, so it would actually be evaluated last in the sequence of movements. If I replaced $2 with $0 above, the cursor would follow the same sequence.
You can further define place holders for those locations.
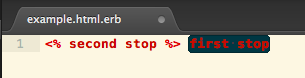
Within the optional tabTrigger tags, set the shortcut. For example, I want to be able to type er, press the tab key to render my erb tags. If you don’t specify the shortcut, you’ll only be able to use the snippet by searching for it through the snippet menu. I can’t imagine why anyone would want to do that so I suggest considering this part a requirement.
1
<tabTrigger>er</tabTrigger>
The optional scope tags specify the type of files in which this snippet will be accessible. I want to use erb tags in Rails views so I have specified text.html.ruby.
1
scope>text.html.ruby</scope>
After ample googling, I’ve concluded there’s no offical list of scopes. I figured out that I needed to use text.html.ruby by looking at another Rails snippet. If you get stuck trying to figure out the scope of the files you want this shortcut to function in, don’t fret. Firstly, remember that it’s optional. You can also google around and likely find your answer anyway. Here’s a work-in-progress list I came across during my search.
The last and also optional input in the skeleton is a description. Here you can specify the text in the Snippets menu. I’ve made mine ERB tags. Now when I open the Snippets menu from Tools, I can search for ERB tags which will identify the shortcut and also generate the text if I click on it. If the description is not defined, it will default to the name of the file.
1
<description>ERB tags</description>
Note that this snippet will only show up in the menu when the search is conducted in files which support it, in our case html.erb files.
Check out the documentation for other available features.
Now we need to save the file. The extension is key here, it must be ‘.sublime-snippet’. The default directory is User within the Packages directory. You can move it into a language specific directory if you wish, but it’s not necessary. So easy right?!
Prior to starting this program, I’d be the first to admit that I wouldn’t consider myself particularly adept in the interworkings of computers. Now I’m on a mission (well me and the school) to educate myself on all things tech. Starting from the basics.
Most of the time, I’ll learn about something at a high level and it seems to make perfect sense. Yet when I’m left to my own devices, things get a bit more tricky. One such subject came in the form of HTTP requests. In the process of buiding our first app (check it out: Octomaps) I was able to dig deeper into the communication channel between client, server and application. Allow me to explain.
When a user enters a URL into a browser (the client), the client sends a request to the server hosting that website. The server then needs to process that request using the application, and return the appropriate response to the browser. That’s the simple explanation.
To expand, hypertext transfer protocol (HTTP), functions as the communicator between the client and the server. A specific request method is sent from the client to the server indicating the desired action to be performed on the resource of the application. I’ll focus on the two most commonly used methods in this post: GET and POST.
The GET method, requests the retrieval of a resource or information.
The POST method, requests that the server accept the data enclosed as a new subordinate of the web resource. This data will typically be processed by the application.
Ok, great. So now we’ve got a general understanding of the GET and POST methods, but now what? Where do they go and how do we use them? That’s exactly where I stood a few days ago. My problem was two-fold. First of all, I needed to understand the interaction between the client-server-application. Then, I needed to wrap my head around creating/sending a form to the client to fill out and then using the inputs in my application. We’ll go through them one at a time.
Let’s walk through what happens in the client-server-application relationship.
Please note that I have used the Sinatra framework to deploy my application on my local host.
REQUEST
A user requests to go to the url: 0.0.0.0:9292
The browser sends an HTTP request to 0.0.0.0:9292: GET / HTTP/1.1
This indicates:
1) The GET method indicates that the server is supposed to return a resource.
2) The requested URI of ‘/’, which is the root
3) The HTTP protocol version (irrelevant for us here)
PROCESS REQUEST:
The server looks at our controller.rb file for instructions.
Searches for a get method which matches the specific url and executes the proceeding code, in our case it renders the form erb file.
RESPONSE:
The server responds with: 200 1709 0.0539????
This indicates:
1) A three-digit numeric status code. 200 means OK. Check out other response codes.
2) ?
3) Request processing time
Next, on to creating/sending/using a form in the application.
I knew what my basic setup was supposed to look like in Sinatra, but I wasn’t entirely sure how to use GET and POST appropiately to achieve my goal. The first hurdle to overcome was determining which method type to use for my form. At first it seemed to me like the there was a clear distinction between the two methods. Use GET to request data and POST to send data, and since I wanted a user to send the application data, I should use post. Unfortunately, it was not so clear cut since in practice you can use either GET or POST to send data from a form. Confusion insued.
Let’s look at the more practical differences between the two methods.
GET - default if method not specified
Appends the form-data to the URL in name/value pairs: URL?name=value&name=value
The length of a URL is limited (about 3000 characters)
Useful for form submissions where a user want to bookmark the result
Never use to send sensitive data, since inputs are visible in the URL
POST - Sends the form-data as an HTTP post transaction
Appends form-data inside the body of the HTTP request (data is not shown is in URL)
Has no size limitations
Form submissions cannot be bookmarked
I proceeded to experiment with the methods to obtain a clearer understanding of their function.
I created a controller.rb file and two forms, get_form.erb and post_form.erb.
12345678910111213141516171819
controller.rb
require 'sinatra'
require 'sinatra/reloader'

get '/get' do
  erb :get_form
end

get '/get/new' do
  "You entered #{params[:fname]} #{params[:lname]}"
end
-------------------------------------------
get '/post' do
  erb :post_form
end

post '/post' do
  "You entered #{params[:fname]} #{params[:lname]}"
end
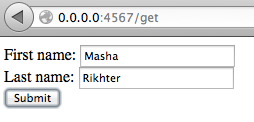
When using get as the form method, the form needs to be directed to another URL in order to have access to the inputted data. This is accomplished by specifying a different URL in the form action. Also, the data can accessed using the get method in the controller at the new url.
123456
get_form.erb
<form action="/get/new" method="get">
  First name: <input type="text" name="fname"><br>
  Last name: <input type="text" name="lname"><br>
  <input type="submit" value="Submit">
</form>
Notice that after submitting the get method form, the inputted data is visible in the URL.
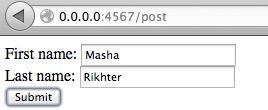
When using post as the form method, the form does not need to be directed to another URL in order to have access to the inputted data. Also, the data can be accessed using the post method in the controller at the same.
123456
post_form.erb
<form action="/post" method="post">
  First name: <input type="text" name="fname"><br>
  Last name: <input type="text" name="lname"><br>
  <input type="submit" value="Submit">
</form>
Notice that after submitting the post method form, the inputted data is not visible in the URL.
GitHub, a distributed version control system, is an essential tool for working on multi-dev projects.
In going through the prework for The Flatiron School, GitHub was one of the easier subjects to grasp…or so I thought. The first day of class would dramatically prove otherwise.
Our first assignment included a deep dive into the mechanics of this collaborative tool, and it was a schmess. With 28 people cloning, forking, commiting, pushing and merging, I was left feeling lost and bewildered.
To be fair, the way in which we were working was not the most accurate depiction of a normal workflow.
In practice, it’s rare to have multiple people working on the same file at the same time.
In any case, I decided to create a basic workflow model to help beginners like myself navigate their way through GitHub with a decreased fear of overwriting work by people who actually know what they’re doing. Note that in the following examples, anything in <brackets> is meant to be replaced with your own info.
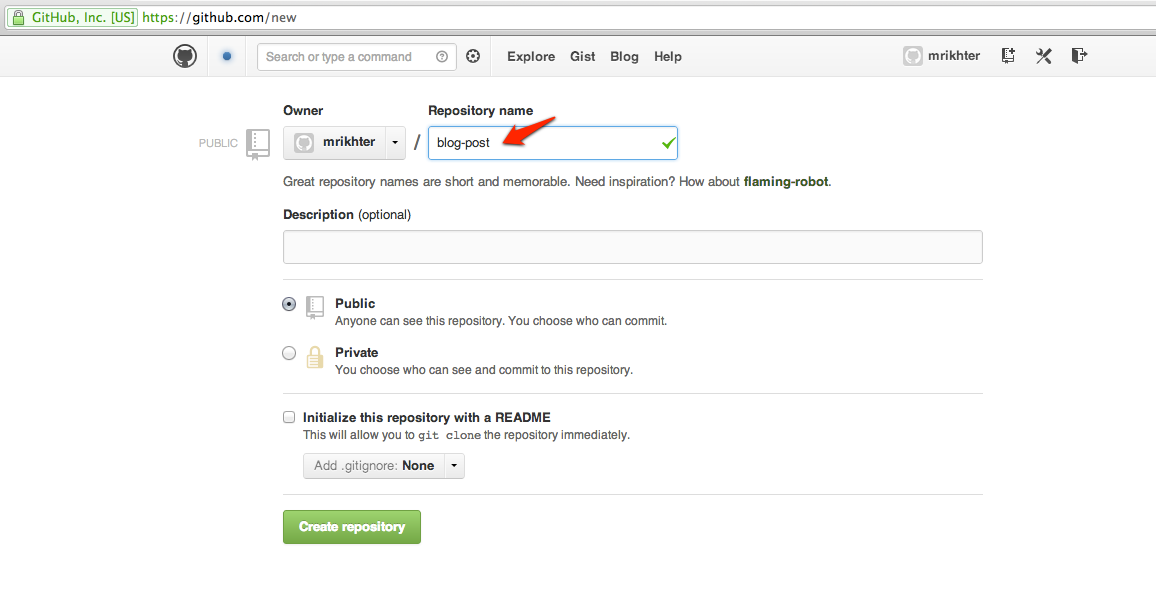
Are you the creator of the remote repository?
If so, create a remote repository on GitHub:
Next, you need to create a directory for your project, initialize it with the necessary git files and point it to the remote repository. You’ll need to obtain the url from the page that pops up after selecting “create repository”:
Note that you can point an existing directory to the remote repo by skipping the first two steps. Just make sure you are in the desired directory when running the commands!
Do you need a copy of an existing repository?
If so, use the clone command to create a local copy of the remote repository. To clone, you need the url from GitHub, which you can find on the repository’s page.
1
$ git clone <url> <name>
Only include name if you want your local copy to have a different name than the remote.
In some cases, you will want to fork instead of clone. You’ll want to use the fork command when you cannot contribute to the remote repository on GitHub.
A fork will create a copy of the remote repo to your account. From there, follow the previous cloning step.
The workflow after the initialization of the repository will operate in the same way.
If you’re planning on doing any work, whether you are working on an existing file or creating new files, you’ll want to create a branch. This will copy the contents of the master (local) repository. Do all of your work on separate branches.
12
$ git checkout -b <your-branch-name>
# this creates a new branch and switches you into it
Let’s pretend you’ve accomplished something you’d like to share. You need to add, commit and eventually push this file up to the remote repository for all the world to see.
123456
$ git add .
# This will add all files that have been changed to a tracking stage.
# If you only want to add specific files, just replace the . with the name of the file.

$ git commit -m "<descriptive message>"
# This commits the staged files.
The next few steps are where the confusion and anxiety ensues. The thing is, there’s a pretty good chance that while you were working, someone else was working too, maybe on the same file you were working on, maybe not. The point is you don’t know, and you need to find out.
Get back to your master branch and update your copy with the most recent copy from the remote repo:
12
$ git checkout master
$ git pull
Good, so now your copy of the master branch is up-to-date. You shouldn’t have any issues here since you did your work in a separate branch. Pulling actually accomplishes two things - fetching the files and merging them onto your master branch. Technically we could have used git fetch and git merge, but again since your work was done on a separate branch we aren’t terribly concerned with other peoples changes yet. The next steps will tell you if your changes are compatible with the changes made to the master.
First, switch to your branch:
1
$ git checkout <your-branch-name>
Next, rebase to update your branch with the changes from the master remote repo from which you just pulled. A rebase takes the changes that you have commited, sets them aside, then it takes all the changes from the master branch, and puts them on your branch, THEN it takes your changes and puts them back on top of that. If there is a conflict, it will provide you with instructions on how to fix it, although to be fair these instructions are indiscernible to me thus far. There are a couple other options but we’ll stick with this one for now as it keeps the commits history linear. Reserve rebase for your local repository since this command rewrites the commit history.
1
$ git rebase master
Cross your fingers that there are no conflicts, solve them if there are (ok, maybe easier said than done) and then merge your branch with the master local and push it to the repo:
My quick and dirty reasoning behind a career change from hedge fund auditor to developer.
Meaningful and Realistic Contributions
In the midst of my previous career, I came to the realization that I functioned as a necessary evil. Somehow I had overlooked this glaring fact when determining my path, but in that instance I knew I couldn’t live my life in this capacity. I wanted to contribute, to be an active and productive being, I had all the qualifications after all. As children, many of us dreamt of changing the world. In time, reality and cynisim creapt over our lofty goals and we let go of our seemingly niave desires. Yet as a developer, not only is this idea of effecting change completely within reach, it is limited only by your imagination.
Consistently Evolving Industry
There is no way to know everything there is to know about programming. Ever. The thought of a lifetime of learning and growth is incredibly appealing to me. The tech world is one of few that literally thrives on account of constant improvement. There is no room for complacency in life and I want my career (aka my day-to-day existence) to be a reflection of this mantra.
The Culture
There is so much to be said for surrounding yourself by the right people…and most people have already said it. I subscribe to the belief that loving what you do is equally important as doing it with good people. Motivated, positive, open-minded and kind people will elevate your mood and in turn your general happiness. I consider myself to be amongst these people and as such I want these people to be amongst me.
I Love Puzzles
Seriously, writing code is like solving a super complicated puzzle. Sure it’s frustrating when you can’t find that perfectly fitting piece and sure sometimes you try to shove one in that you know doesn’t fit, but you can’t deny that giddy sense of accomplishment when it all works out. I want to feel that joy everyday.
Over the next three months, I’m eager to uncover new reasons that uphold my decision that I didn’t even know existed.
Are you contemplating taking this leap as well?
If you’re already there, what were your motivations?


 A fork will create a copy of the remote repo to your account. From there, follow the previous cloning step.