GitHub, a distributed version control system, is an essential tool for working on multi-dev projects. In going through the prework for The Flatiron School, GitHub was one of the easier subjects to grasp…or so I thought. The first day of class would dramatically prove otherwise. Our first assignment included a deep dive into the mechanics of this collaborative tool, and it was a schmess. With 28 people cloning, forking, commiting, pushing and merging, I was left feeling lost and bewildered. To be fair, the way in which we were working was not the most accurate depiction of a normal workflow. In practice, it’s rare to have multiple people working on the same file at the same time. In any case, I decided to create a basic workflow model to help beginners like myself navigate their way through GitHub with a decreased fear of overwriting work by people who actually know what they’re doing. Note that in the following examples, anything in <brackets> is meant to be replaced with your own info.
Are you the creator of the remote repository?
If so, create a remote repository on GitHub:

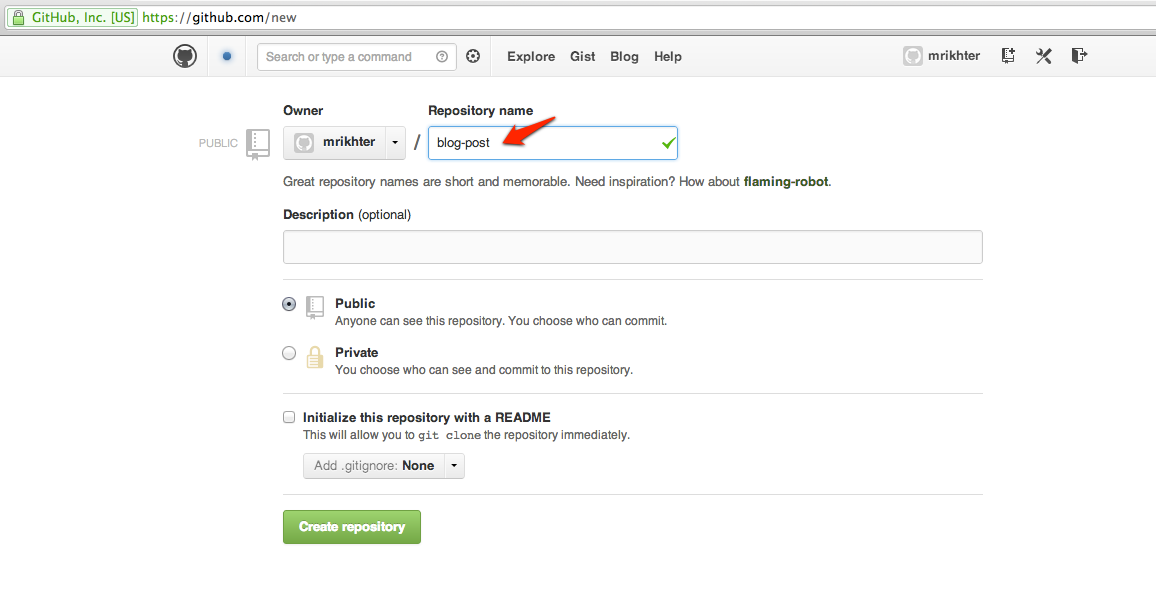
Next, you need to create a directory for your project, initialize it with the necessary git files and point it to the remote repository. You’ll need to obtain the url from the page that pops up after selecting “create repository”:

1 2 3 4 | |
Note that you can point an existing directory to the remote repo by skipping the first two steps. Just make sure you are in the desired directory when running the commands!
Do you need a copy of an existing repository? If so, use the clone command to create a local copy of the remote repository. To clone, you need the url from GitHub, which you can find on the repository’s page.
1
| |
Only include name if you want your local copy to have a different name than the remote.
In some cases, you will want to fork instead of clone. You’ll want to use the fork command when you cannot contribute to the remote repository on GitHub.
 A fork will create a copy of the remote repo to your account. From there, follow the previous cloning step.
The workflow after the initialization of the repository will operate in the same way. If you’re planning on doing any work, whether you are working on an existing file or creating new files, you’ll want to create a branch. This will copy the contents of the master (local) repository. Do all of your work on separate branches.
1 2 | |
Let’s pretend you’ve accomplished something you’d like to share. You need to add, commit and eventually push this file up to the remote repository for all the world to see.
1 2 3 4 5 6 | |
The next few steps are where the confusion and anxiety ensues. The thing is, there’s a pretty good chance that while you were working, someone else was working too, maybe on the same file you were working on, maybe not. The point is you don’t know, and you need to find out. Get back to your master branch and update your copy with the most recent copy from the remote repo:
1 2 | |
Good, so now your copy of the master branch is up-to-date. You shouldn’t have any issues here since you did your work in a separate branch. Pulling actually accomplishes two things - fetching the files and merging them onto your master branch. Technically we could have used git fetch and git merge, but again since your work was done on a separate branch we aren’t terribly concerned with other peoples changes yet. The next steps will tell you if your changes are compatible with the changes made to the master. First, switch to your branch:
1
| |
Next, rebase to update your branch with the changes from the master remote repo from which you just pulled. A rebase takes the changes that you have commited, sets them aside, then it takes all the changes from the master branch, and puts them on your branch, THEN it takes your changes and puts them back on top of that. If there is a conflict, it will provide you with instructions on how to fix it, although to be fair these instructions are indiscernible to me thus far. There are a couple other options but we’ll stick with this one for now as it keeps the commits history linear. Reserve rebase for your local repository since this command rewrites the commit history.
1
| |
Cross your fingers that there are no conflicts, solve them if there are (ok, maybe easier said than done) and then merge your branch with the master local and push it to the repo:
1 2 3 | |
Tada! We’re all on our way to becoming productive members of GitHub and society at-large.